TL;DR
- Always diagnose the check engine light cause before resetting it, as ignoring issues risks severe engine damage.
- DIY reset methods include using an OBD-II scanner to clear codes or disconnecting the negative battery cable for about fifteen minutes.
- Koeppel Hyundai serving Queens, NY and neighboring areas has expert technicians and diagnostic tools for thorough, reliable repairs and maintenance. Get in touch if you need a car repair.
-----
Also Read: From Toy Drives to Life-Saving Research - How Koeppel Hyundai's Community Program Makes a Difference
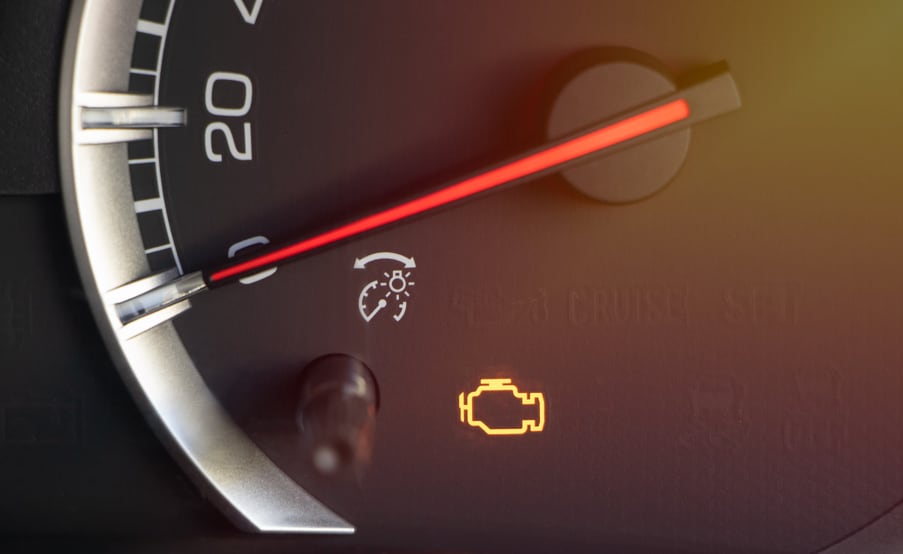
Seeing the check engine light illuminate on your Hyundai car's dashboard can be unsettling and often a cause for concern. Many drivers immediately worry that this warning indicates major issues that will require expensive repairs. However, costly fixes are not always necessary, and in several instances, you can reset the light without significant expense. This guide details essential steps regarding how to remove check engine light on your Hyundai, starting always with proper diagnosis, and highlights the expert resources available at the Koeppel Hyundai service center for drivers across New York.
The Crucial First Step is Diagnosis
Before you attempt to reset or clear the light, it is absolutely essential to determine the root cause of the warning. The check engine light serves as an indication that something is wrong with your vehicle, and if you simply reset it without addressing the underlying issue, you risk encountering much more significant problems later on. Ignoring the warning light can lead to a variety of negative consequences, including poor fuel economy, a sluggish engine, potential damage to the catalytic converter, higher repair bills down the line, and possibly failing your next required emissions test.
Common Reasons Your Check Engine Light Appears
The issue that triggers the check engine light can vary greatly, ranging from a minor oversight to a complex mechanical failure. Understanding the common culprits helps guide your next steps.
- Loose Gas Cap - A simple loose, broken, or missing gas cap is a frequent cause. Issues with the gas cap reduce fuel pressure and permit fuel vapors to escape. This affects fuel economy and increases harmful emissions.
- Fouled Spark Plugs or Spark Plug Wires - Spark plugs create the necessary hot spark to ignite the air-and-fuel mixture in the cylinder, allowing the engine to run. Faulty plugs or wires can cause the engine to misfire, decreasing performance and fuel economy, and perhaps even preventing the engine from starting altogether.
- Faulty Oxygen Sensor - Exposure to hot exhaust gas over time can require the replacement of the oxygen sensor. This sensor provides vital information about the air-fuel mixture to the Electronic Control Unit (ECU). A defective oxygen sensor may cause the vehicle's computer to supply too much or too little fuel. If the engine receives too little fuel, there is a risk of total engine failure, while too much fuel causes excessive smoke and odor.
- Faulty Mass Air Flow Sensor - The Mass Air Flow (MAF) sensor measures the volume of air entering the engine to ensure the proper air-fuel ratio. If the MAF sensor is exposed to dirty or particle-rich air, it could fail. A faulty MAF sensor can cause misfires, leading to poor fuel economy, reduced performance, and potential additional damage to your engine.
- Failing Catalytic Converter - The catalytic converter is an essential component of the emissions system, responsible for removing toxic carbon monoxide. Especially common in higher mileage vehicles, the catalytic converter may clog with material. A clogged or failing converter severely impacts vehicle performance and fuel economy.
Understanding Check Engine Light Behavior
The way the light behaves can help New York drivers determine the severity of the problem.
- The light comes on only in certain conditions - If the light illuminates intermittently, pay close attention to any changes in vehicle performance when the light is active. If performance suffers, drive your vehicle as little as possible until you arrange service. An intermittent light often suggests something is on the verge of failing.
- The light is constantly on - The onboard diagnostic system has confirmed that something is wrong and requires correction. Even if the car seems fine, it is best to schedule service quickly to avoid additional problems.
- The light is on with a noticeable performance issue - If you observe a consistent drop in performance while the light is illuminated, your vehicle may have automatically entered "limp-mode". This mode is intended to prevent more extensive damage. In this situation, you must proceed directly to a Hyundai service center or have the vehicle towed to prevent engine damage.
- The light is blinking while driving - A consistently blinking check engine light is not the same as a light that occasionally flickers; blinking typically signifies a major issue. You must pull over when safe. It is suggested that you have the vehicle towed to Koeppel Hyundai or another certified repair shop to ensure safety.
The DIY Guide on How to Remove Check Engine Light
Once you have identified and corrected the cause of the issue, you can attempt to reset the light.
Method 1: The OBD-II Scanner Approach
- The most reliable way to reset your Hyundai’s check engine light involves using an On-Board Diagnostics-II (OBD-II) scanner. This is also the necessary tool for diagnosis, as it reads the error codes stored in your car's computer. OBD-II scanners are relatively simple to use and are available at most auto parts stores.
- Locate the Port Ensure your car is turned off. Locate the OBD-II port, which is generally found under the dashboard, near the steering wheel.
- Plug In and Scan Plug the scanner into the port. If using it for diagnosis, turn the key in the ignition without starting the engine. The scanner will read the code that triggered the light.
- Clear the Code If you have already addressed a minor issue or if the issue was temporary, turn on the scanner and follow the instructions to clear the error code. This method is preferable because it clears the code without erasing your car’s settings, such as radio presets.
- Confirm the Reset Once the code is cleared, turn off the scanner and remove it from the port. Start your car. If the process was successful, the check engine light should no longer be illuminated.
Remember that the scanner only erases the message from the system. If you clear the codes but fail to fix the underlying mechanical problem, the check engine light will undoubtedly return.
Method 2: The Battery Disconnect Reset
If you have confirmed that the issue was minor and you have fixed it, such as tightening a loose gas cap, you can try disconnecting the battery to reset the light.
- Preparation Turn off your car completely and remove the key from the ignition.
- Locate and Disconnect Pop the hood and locate the battery. You must disconnect the negative cable. This cable is typically colored black. Use a wrench to loosen the bolt holding the cable in place, and then remove the cable from the battery terminal.
- Wait Allow 15 to 20 minutes to pass. This waiting period is crucial for the car’s computer system to reset.
- Reconnect and Test Reconnect the cable to the battery and securely tighten the bolt. Start your car. If the check engine light has been reset, it will remain off.
The Quick Fix Checking the Gas Cap
The gas cap might seem insignificant, but its proper connection is necessary to maintain the correct pressure in your fuel system and prevent fuel vapors from escaping. This quick five-minute check can often save you time and money.
- Park and Stop Park your Hyundai and shut off the engine.
- Inspect Go to the location of the gas cap. Unscrew it and check carefully for cracks, damage, or worn-out rubber seals.
- Secure If the cap appears undamaged, screw it back onto the filler neck until you hear it click three to four times. If the cap is worn out or damaged, replace it with a new one made specifically for your Hyundai model.
- âDrive After tightening or replacing the gas cap, you must drive your vehicle for a few miles to permit the system to reset itself. If the check engine light stays illuminated after this check, then you need to make an appointment at a Hyundai service center
When Professional Expertise is Required
Resetting the check engine light is a simple DIY process that can save you time and money when the underlying issue is minor. However, if you are unsure how to remove check engine light using the OBD-II scanner, how to safely disconnect the battery, or if the light keeps returning, consulting a qualified mechanic is always the safest course of action.
For New York drivers, the trusted experts at Koeppel Hyundai are available to provide thorough service. If the OBD-II scanner does not resolve the issue, it is time to consult one of their trained service technicians. The team at Koeppel Hyundai uses the most current diagnostic equipment, enabling them to quickly read and interpret Hyundai OBD-II Trouble Codes for accurate diagnosis and repair.
Conclusion
Confronting the check engine light requires discipline: diagnose first, fix the underlying problem second, and only then tackle how to remove check engine light. Whether your car needs a simple gas cap adjustment or a more complicated diagnostic procedure, the experts at Koeppel Hyundai are prepared to assist New York drivers, ensuring their vehicles are properly cared for and running at their peak performance.
Read Next: Important Things to Know About Hyundai Service Interval for New York Drivers
